8.07.2009

Cloth Diapers

So while I was pregnant, my husband and I had discussed using cloth diapers. The idea had eventually passed when I had been planning on going back to work and I didn't think that would be feasible. Well I became a stay-at-home Mom back in June and I decided to think about using them once again. I found a great program online at Jillian's Drawers that allowed me to try cloth diapers for 3 weeks and only cost me $10 (which is probably cheaper then 3 weeks worth of disposables). The trial gave me a chance to see if I liked using cloth diapers, and if so, which type I preferred. I came to find that there are SO MANY different kinds and I really had no idea where to start. Cloth diapers have come a long way since I was a baby and my Mom was getting pricked with diaper pins. No more pins! Depending on how much you want to spend, cloth diapering can be as easy as disposables (and even husband friendly) with just a few extra loads of laundry a week.

Let me make a rundown of the different types of cloth diapers out there:

Prefold: these are the old school cloth diapers (what many use as burp cloths) but diaper pins are no longer necessary with the Snappi. You also need to put a diaper cover over these to prevent leaking.


Contour: These are similar to a prefold except that instead of rectangular, they are "contoured" to the shape of a baby so no folding is necessary. Again, these are used with a Snappi and diaper cover.


Fitted: These are typically made of microfiber and look similar to a disposable as they have elastic around the legs and a Velcro closure. These also need a diaper cover.


Pockets: These have the convenience of a disposable as they have elastic around the leg and Velcro or snap closure and no diaper cover is needed. There is a "pocket" inside the diaper to allow as many absorbent layers to be used as needed.


All-In-Ones: It doesn't get much more dumby proof then this. Everything is all packed into one diaper....no Snappis, no covers, no inserts.


One-Size: These are quite ingenious. These diapers (some are pockets and some are all-in-ones) adjust in size according to your babies height/weight so you only need to buy one size diaper for the length of time your child is in diapers (most fit from 7-35 lbs)


After doing my trial I decided to get All-In-One One-Size diapers for day and Pocket One-Size diapers for night. I like the pockets better at night because I can add more layers to keep him dry all night long. Both kinds of diapers I bought are made by BumGenius. I absolutely love them! Laundering them really is not bad at all and the "ick" factor is not nearly as bad as I had anticipated; especially since I use flushable liners. For those considering making the switch, I highly recommend checking out the diaper trial. It will help you make up your mind. And besides being better for the environment, they are cheaper (in the long run) then disposables and they are btter for your babies skin because the fabric breathes.

Here is a list of cloth diapering supplies you would need:
  • Diapers (duh!)
  • Cloth Wipes (Optional, but I recommend it. I just use baby washcloths by Gerber which are super cheap.)
  • Wipes Solution (not necessary for cloth wipes but I like to use it....some people just use water with some baby wash)
  • Diaper Pail (a kitchen garbage can with a lid works just fine)
  • Diaper Liner (its like a waterproof laundry bag)
  • Wetbag (this is for trips out to keep soiled diapers in)
  • Diaper Cream (You need to make sure you have something friendly to cloth diapers as most of your "known" brands can ruin the absorbancy of your diaper.)
  • Laundry Detergent (Again, you need to make sure your detergent is safe to use with your diapers)

That's it! Happy diapering!
Corn Muffin

Another yummy muffin coming in around the 100 calorie mark (just 2 points on Weight Watchers). Hope you enjoy!

Ingredients:
  • 1 cup whole wheat flour
  • 1 cup cornmeal
  • 1/3 cup sugar
  • 1 teaspoon baking soda
  • 3/4 teaspoon salt
  • 1 cup plain nonfat yogurt
  • 2 eggs, beaten

Directions:
  1. Preheat oven to 400 degrees. Lightly grease a 12 muffin pan.
  2. In a large bowl, mix flour, cornmeal, sugar, soda and salt.
  3. Stir in yogurt and eggs. (Do not over mix, stir only until well blended.)
  4. Pour batter into 12 muffin pan.
  5. Bake in preheated oven for 10 to 15 minutes, or until golden and inserted toothpick comes out clean.

7.28.2009

Banana Muffins

These came out great! They are super moist and very banana-y. My son and husband seem to love them so that counts for something. They are practically fat free (minus the egg) and are only 2 Weight Watcher points per muffin.

Ingredients:
  • 1 1/2 c whole wheat flour
  • 1 tsp baking powder
  • 1 tsp baking soda
  • 1/2 tsp salt
  • 1 tsp cinnamon
  • 1/2 tsp nutmeg
  • 4 large (very ripe) bananas
  • 3/4 c sugar
  • 1 egg (beaten)

Directions:
  1. Preheat oven to 350 and coat 12 muffin tins with non-stick spray.
  2. In small mixing bowl sift together flour, baking powder, baking soda, salt, cinnamon, and nutmeg.
  3. In separate bowls puree one banana and mash the other three (I used a potato masher but a fork would work fine as well).
  4. In large mixing bowl, combine bananas, sugar, and egg.
  5. Fold flour mixture into banana mixture; just until combined (do NOT over stir).
  6. Spoon into 12 muffin tins and bake for 20 minutes or until inserted toothpick comes out clean.

7.20.2009

Zucchini Spice Muffins

These muffins are great, a cross between a spice muffin and zucchini bread. I altered a recipe I found on allrecipes.com and they came out really great! For those on Weight Watchers they are only 2 points.

Ingredients:
  • 2 cups shredded zucchini
  • 1/3 cup boiling water
  • 2 3/4 cups whole wheat flour
  • 1 1/2 cups white sugar
  • 1 1/4 teaspoons baking soda
  • 1 teaspoon salt
  • 1 teaspoon ground cinnamon
  • 1 teaspoon ground cloves
  • 1 teaspoon ground all spice
  • 1 teaspoon ground nutmeg
  • 3 eggs, beaten
  • 1/3 cup applesauce
  • 1 teaspoon vanilla extract
Directions:
  1. Preheat oven to 350 degrees F (175 degrees C). Lightly grease a 12 cup and a 6 cup muffin pan.
  2. In a large bowl, stir together zucchini and boiling water.
  3. In a separate bowl, mix flour, sugar, baking soda, salt, cinnamon, cloves, coriander, and nutmeg.
  4. Blend eggs, applesauce, and vanilla extract with the zucchini. Stir the zucchini mixture into the flour mixture. Spoon into the prepared muffin pans.
  5. Bake 20 to 25 minutes in the preheated oven, or until a knife inserted into the center of a muffin comes out clean.

6.03.2009

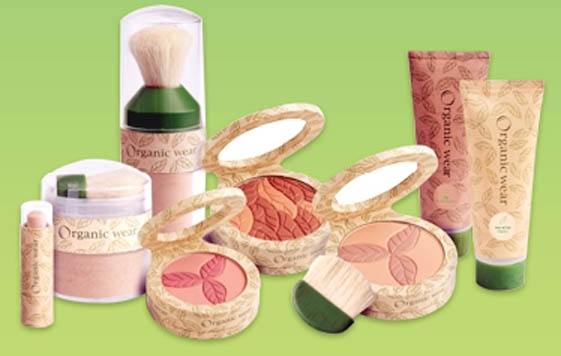
Physicians Formula Organic Wear


I have been using this makeup for about a month. I was not too sure what to expect but I really love this line! I have extremely fair and sensitive skin. I bought the following products: liquid foundation, pressed powder, concealer, blush, eyeshadow, eyeliner, lip gloss, and lip veil. I really wanted to try the mascara as well but the CVS I bought it from doesn't carry it. The only product I would say that I dont LOVE is the concealer. It is very "plasticy" in that it does not apply or spread very easily. The foundation covers very well and has a really great smell to it. The eyeliner is great although I am that lazy person that hates to sharpen pencils and likes the twisty eyeliners, but I could definitly deal with that. The powder, blush, and eyeliner dont see very different then what you would normally buy. I wish there were more colors for the eyeshadows. The lip veil is ok although I wish there was more of a color selection for that as well. It has this cooling effect on your lips. I love the lip gloss, however.

The packaging for the products is pretty great as well. It is all made of paper which is really cool. I dont, however, like the brushed they come with and think it would be better if they saved some more materials and you just use your own brushed rather then getting new ones every time you buy their product.

All in all, I give the products a big two thumbs up. I will be using this regularly.

5.26.2009

And this is why I do not use Johnson & Johnson Products anymore...

This is an article that was released yesterday by the Associated Press regarding known carcinogens found in Johnson & Johnson products....

Consumer group pushes J&J on chemicals in shampoo


TRENTON, N.J. – A coalition of health, environmental and consumer groups is demanding that health products giant Johnson & Johnson remove tiny amounts of two chemicals suspected of causing cancer from its Johnson's Baby Shampoo and other products.

In a letter sent late Friday by the Campaign for Safe Cosmetics to J&J's chief executive, William Weldon, the seven-year-old group asks the company by the end of August to reformulate its personal care products so that they are free of 1,4-dioxane and any preservatives that release formaldehyde.

The letter was signed by nearly 50 groups representing about 1.7 million members, from the Environmental Working Group and Friends of the Earth to the American Nurses Association and Physicians for Social Responsibility.

Johnson & Johnson spokesman Bill Price said, "The trace levels of certain compounds that were noted by the Campaign for Safe Cosmetics can result from processes that make our products gentle for babies and safe from bacteria growth. Many regulatory agencies around the world consider these trace levels safe."

Price said the New Brunswick, N.J.-based company takes concerns about its products "very seriously" and would consider meeting with the Campaign for Safe Cosmetics. He said J&J has no immediate plans to remove the two ingredients.

The chemicals in question are 1,4-dioxane, a byproduct of the manufacturing process, and the preservative formaldehyde, which is slowly released by a chemical called Quaternium-15 to kill bacteria. According to the Environmental Protection Agency, 1,4-dioxane and formaldehyde both are probable human carcinogens; formaldehyde also is a skin, eye and respiratory irritant.

"There's really no excuse for a baby shampoo marketed as the No. 1 choice of hospitals to contain chemicals suspected of causing cancer," Lisa Archer, the campaign's national coordinator, told The Associated Press in an interview.

Tests by an independent laboratory commissioned by the campaign, Analytical Sciences of Petaluma, Calif., found Johnson's baby shampoo had 210 parts per million of formaldehyde, and about two dozen other products out of 48 tested had similar or higher levels.

Johnson's baby shampoo also had a low level of 1,4-dioxane, a chemical banned by the European Union that was also found in three Aveeno baby wash products made by J&J, Johnson's moisture care and oatmeal baby washes, and about 25 baby and personal care products made by other companies.

Though the amounts in question are so small that many deem them safe, Dr. Sidney Wolfe, acting director of consumer group Public Citizen, said, "Generally with carcinogens, there isn't any safe level."

The campaign notes that the two chemicals are not listed on product labels because they are contaminants, not ingredients.

The campaign released its test results in March. At that time, Dr. John Bailey, chief scientist for the Personal Care Products Council, said the "extremely low" levels of chemicals in the products tested "are not a cause for health concern."

Last month, Sen. Kerstin Gillebrand, D-N.Y., introduced a bill directing the FDA to regulate such products made for children.

The campaign's letter to Weldon states that other companies make similar products "by using ingredients that do not have contamination concerns." The letter also notes J&J products in Japan do not release formaldehyde because it is banned in products there.

Price said that is true, adding J&J products "meet or exceed the regulatory requirements in every country where they are sold."

However, the U.S. Food and Drug Administration does not regulate cosmetic products, said Wolfe, whose group is not involved in the campaign.

"The cosmetic industry has pounded on ... Congress to keep the FDA from having any kind of authority to require (safety or testing of) cosmetic ingredients used by tens of millions, including many children" for more than three decades, he said.

He said these chemicals can be absorbed by the skin but could easily be removed from the products — at additional cost.

If the two chemicals were food additives, he noted, they would have to be tested before being sold to prove they didn't contain dangerous chemicals.

"These products would flunk such a test," Wolfe said.

5.08.2009

Curry Chicken Salad

I threw this together for lunch today and it was so good and easy I had to share.

Ingredients:
5 oz can of chicken breast in water
1/4 c shredded carrots
1/4 c plain lowfat yogurt
1/4 c raisins
1 tsp curry powder
salt and pepper to taste

Directions:
Drain chicken well, put in bowl, and split apart with fork. Add remaining ingredients and stir to combine.

This makes two small servings (3 points each) or one large and is great with arugula on a whole wheat wrap.

4.28.2009

Cereal Bars

So I made my own cereal bars this weekend and they turned out awesome so I thought I'd share the recipe. They are just 2 weight watchers points (for those that are counting) the way the recipe is written but I could think of some yummy things I'd add if I didnt care so much about the points (i.e. chocolate chips, different dried fruits, coconut, etc).

Dry Ingredients:
1 c Rolled Oats
3 1/2 c Kashi Go Lean Cereal
1/2 c cream of wheat
1/2 c oat bran
1 tsp baking soda
2 Tbs Splenda Brown

Wet Ingredients:
1/2 c unsweetened applesauce
2 ripe bananas mashed
1 tsp vanilla extract
1/3 c honey

Add-In Ingredients:
1/3 c raisins
1/3 c slivered almonds

Directions:
Preheat oven to 325. Combine Dry Ingredients and then add Wet Ingredients. Mix thoroughly. Add "Add-In" ingredients. Press mixture into a 9x13 pan greased with cooking spray. Bake for 20 minutes or until golden. Cut into 15 bars. ENJOY!!

4.18.2009

Homemade Furniture Polish

What you need:

  • 24 oz spray bottle
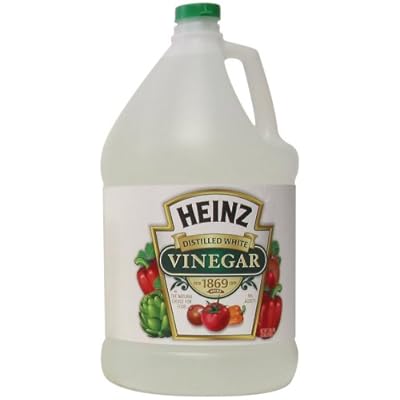
  • 3/4 cup white distilled vinegar
  • 1-1/2 cup vegetable or olive oil
  • 3/8 cup lemon juice

Mix all ingredients in spray bottle and shake well before each use.

This mixture make me think of salad dressing, but it really does work well.

Homemade Hardwood Floor Cleaner

What you need:

  • 32 oz spray bottle
  • 3-1/2 cups boiling water
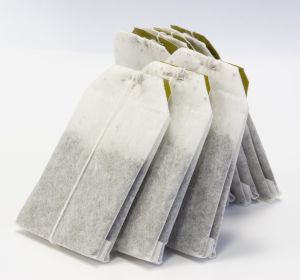
  • 4 tea bags
  • 1/2 cup white distilled vinegar
  • 1/4 cup lemon juice

Let tea bags steep for at least 5 minutes in the boiling water or until they are brewed very strong. Allow tea to cool to room temperature (or place in fridge to speed process). Place in spray bottle along with remaining ingredients, shake, and use.

This is a great cleaner for hardwood floors and helps to release the grain of wood and add shine to the finish.

Homemade Glass Cleaner

What you need:

  • 32 oz spray bottle

  • 1-3/4 cup rubbing alcohol
  • 1-3/4 cup water
  • 1/2 cup white distilled vinegar
  • 1/4 cup lemon juice
  • 20 drops essential oil (scent of choice)

Combine all ingredients in spray bottle. Shake and use.

I found this glass cleaner to work alarmingly well (I wasn't expecting much) and may say it works better then Windex.

Homemade All-Purpose Disinfecting Cleaner

What you need:

  • Spray Bottle (I used 32 oz)
  • 1 tsp Castile Soap (I used Dr Bronner's with no scent. You can buy it at Target.)
  • 2 cups Water
  • 2 cups Distilled White Vinegar (get a gallon as you will use it quickly)
  • 60 drops of Essential Oils (You can get this at your local natural food market. I used Tea Tree and Lavendar **30 drops of each** but use whatever scents you like. Note that Tea Tree is considered to be a natural disinfectant)


Just combine all ingredients in your spray bottle. I found this to be a little streaky so I would not use on surfaces with a shine (use the glass cleaner for those).

4.11.2009

Organic Baby Bath Products

So when my son TJ was first born, I used all Johnson and Johnson products. They smelled great but I found that they were not very moisturizing to his skin (even the lotion) and I think a lot of this is due to its heavy fragrance. After doing some research, I came across a website called Skin Deep which reviews the safety of cosmetics. It lists the toxicity level in different cosmetic products (adult and baby alike) and I would highly recommend that you do a search for the products you use. You will be surprised (and maybe a little horrified) at the level of toxins in most of the products we use.

Now let look at Webster's definition of toxin and toxic:
tox·in: a poisonous substance that is a specific product of the metabolic activities of a living organism and is usually very unstable, notably toxic when introduced into the tissues, and typically capable of inducing antibody formation

tox·ic: containing or being poisonous material especially when capable of causing death or serious debilitation
So why the heck do we put these toxins on our body which absorb into our skin and move freely through our blood stream?! What I want to know, is why the products with high levels are allowed to be put on shelves making us believe it is safe for us to use.

Anyway, I found that Johnson and Johnson products, although not extremely high in toxins, definitly have more that some other options out there. My purpose is to expose my son to as few of these toxins as I possibly can because, if anything, it can only benefit him. I trully believe that knowledge is power and we need to take advantage of educating ourselves as parents.

So I decided, after hearing many great reviews, to buy some California Baby products. Let me tell you that I LOVE this product line. They smell great and they are so much more hydrating than what I was using. I love the diaper cream as it has cleared TJs diaper rash so much more quickly then the Desitin I was using. The Calendula cream is also really nice. I bought the sunscreen but have yet to try it (I am excited to use it myself because my skin is so sensitive and I've yet to find a lotion that does not burn). I want to try the handsoap but have not done so yet. Oh yeah, and their bath bubbles are great and even come with a bubble wand so you can blow bubbles (FUN!). As an added bonus, these products are great for us adults with sensitive skin!

4.09.2009

Happy Easter: How to Dye Eggs Naturally

I saw this on marthastewart.com and just had to share because these eggs look so much more beautiful than those made with your typical egg-dying kit. (for original article go HERE)


The tradition of dyeing eggs goes back to medieval times when people made pace eggs to celebrate spring and Pasch, the original name given to Easter or Passover.
Your kitchen is full of natural dyes. Common food items such as red cabbage, onion skins, and coffee can be used to transform plain white eggs into colorful Easter gems. Kids will especially love discovering all the different colors they can create -- let them experiment using hard-boiled eggs and bowls of cold dyes.
Tools and Materials
Natural dyeing agents (red cabbage, turmeric, onion skins, beets, and coffee)
3-quart pot (or larger)
White vinegar
Strainer
Small bowls
Eggs
Large metal spoon
Paper towels
Drying rack

Dye Recipes
Select a dyeing agent, and place it in the pot using the amount listed below. Add 1 quart water and 2 tablespoons white vinegar to pot; if more water is necessary to cover ingredients, proportionally increase the amount of vinegar. Bring to a boil, then lower heat. Allow the ingredients to simmer for 30 minutes. Strain dye into a bowl.

Red-cabbage dye: 4 cups chopped cabbage
Turmeric dye: 3 tablespoons turmeric
Onion-skin dye: 4 cups onion skins (skins of about 12 onions)
Beet dye: 4 cups chopped beets
Coffee dye: 1 quart strong black coffee (instead of water) Cold-Dipping Method
Cold-Dipping Method
With this method, the eggs and the ingredients for the dye are boiled separately. Using a metal spoon, lower cooled hard-boiled eggs into a bowl of cooled dye, and let them soak for as little as 5 seconds or as long as overnight, depending on the depth of color you desire. Remove eggs with spoon, pat dry with paper towels, and let dry on a wire rack. The cold-dipping method produces subtle, translucent shades, but can result in uneven coloring unless the eggs are rotated vigilantly while in the dye. For hollow eggs that will last indefinitely, cold-dip raw eggs, then blow them out after they are dyed.

Boiled Method
This method involves boiling the eggs with the dye; the heat allows the dye to saturate the shells, resulting in intense, more uniform color. Set raw eggs in a pot of strained dye; bring to a boil for the amount of time specified in our color glossary. Remove and dry eggs as with the cold-dipping method.

Finish (optional)
Natural dyes tend to fade over time, so finish any eggs you plan to keep with a matte or gloss acrylic spray varnish. To create an egg-spraying stand, stick a 6-inch length of wire into a block of Styrofoam; prop a hollow egg onto the wire through one of its holes. Spray egg with a coat of varnish in a well-ventilated area, and let dry.

Color Glossary
Natural dyes can sometimes produce unexpected results, so don't be surprised if, for example, your red-cabbage dye yields blue eggs. Use the following guide to help you achieve the colors you desire.


Deep Gold: Boil eggs in turmeric solution, 30 minutes.
Sienna: Boil eggs in onion-skin solution, 30 minutes.
Dark, Rich Brown: Boil eggs in black coffee, 30 minutes.
Pale Yellow: Soak eggs in room-temperature turmeric solution, 30 minutes.
Orange: Soak eggs in room-temperature onion-skin solution, 30 minutes.
Light Brown: Soak eggs in room-temperature black coffee, 30 minutes.
Light Pink: Soak eggs in room-temperature beet solution, 30 minutes.
Light Blue: Soak eggs in room-temperature cabbage solution, 30 minutes.
Royal Blue: Soak eggs in room-temperature cabbage solution overnight.
Lavender: Soak eggs in room-temperature beet solution, 30 minutes. Follow with room-temperature cabbage solution, 30 seconds.
Chartreuse: Soak eggs in room-temperature turmeric solution, 30 minutes. Follow with room-temperature cabbage solution, 5 seconds.
Salmon: Soak eggs in room-temperature turmeric solution, 30 minutes. Follow with room-temperature onion-skin solution, 30 minutes.

Do You Know?
The tradition of dyeing eggs goes back to medieval times when people made "pace" eggs to celebrate spring and Pasch, the original name given to Easter or Passover.

First Published: April 1998

So here is the deal....

I have always been aware of recycling and such but since I had my son last October I have really become so much more aware of all the harmful things out there that I really want to try to protect him from. I truly believe the reason there is so much cancer and health problems out there is because we are poisoning our bodies with toxins in products that we use every day. My goal is to slowly evolve the lifestyle of me and my family so that we are living in a healthier environment. I am not planning on making any drastic changes right off the bat because this is a process and as I am ready for that next step I will go there.

Things I already do:
  • recycle paper, plastics, and metals
  • turn off lights that are not necessity
  • thermostat controlled by timer
  • energy efficient light bulbs
  • eat organic when possible/affordable
  • shop local farmers markets in season
  • have a vegetable garden
  • use filtered tap water and reusable bottles
  • breastfeeding

Things I am currently trying to implement:
  • using non/low-toxic bath/body products on my son and myself
  • make my own non-toxic house cleaning supplies
  • reusable shopping bags
  • make my son's baby food from fresh organic products